The Wandering Balloon let us re-play past Voyage of Wonders realms and the realm that just got added is The Hazy Timberland, a really nice Voyage of Wonders we had back in May 2020 and it will be available in the Wandering Balloon starting December 19th, 2020. It’s a realm that has some interesting puzzle aspects in it and you need to do it right or you won’t be able to reach the final boss for great rewards this time.
As always, I have a step-by-step guide below that you can use to solve the realm below.
The Hazy Timberland General & Rewards
The main objective in The Hazy Timberland is to actually unlock each part of the map in the right order to keep up with the enemy camps that get stronger in each section (the wrong order can set you up with camps that you need more relics for). The final boss fight will not be a problem unless you get some really bad relics all the time.
What’s The Reward In The Hazy Timberland?
Now in Wandering Balloon, the main rewards are 1000x Diamonds and 10x Faction Scrolls:
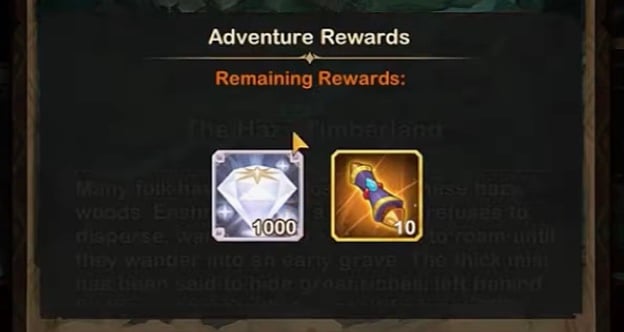
But you will also get some sour stones, emblems and boosters from the Golden Chests, too.
If you have troubles with your team, please refer to my frequently updated guide on the best teams in AFK Arena here or the tier list of the best heroes (including their best build). Also, don’t miss out on the recently new gift codes that I posted here.
The Hazy Timberland Walkthrough
Without further ado, let’s jump right into the walkthrough where I show you step-by-step how to solve The Hazy Timberland and beat the final boss.
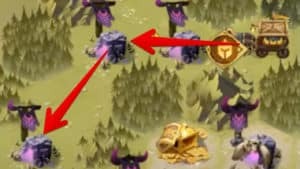
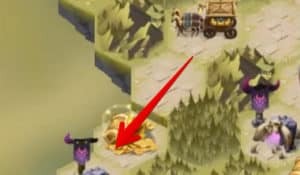
Step 1 – the start of the Hazy Timberland realm is pretty straightforward and you will face three camps here that you need to fight through without any choice.
Enemies are quite easy to beat at this stage and you can already fill the energy bars (turn off auto to the end of the battle) to have a big advantage for the next fight when your heroes can directly drop their ultimate at the start.
After that you will find 2 more camps to clean and you’re in the center of the map where the fun begins.
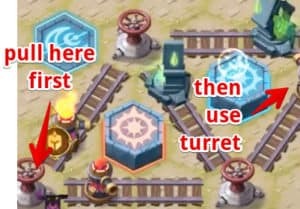
Step 2 – you can see that railroad puzzle in the middle now and that’s the central point where you do gain access to the other parts of the map of The Hazy Timberland. It’s important to do it in the right order or you might need to fight enemies that are too strong as they will grow stronger in each section.
Use this turret without making any changes to the arrangement in the middle now.

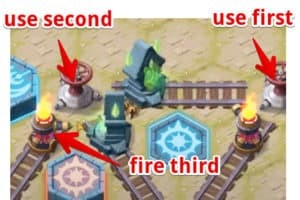
Step 3 – now it’s time to light up the next turret and you do that by using the upper left switch and the upper right switch in that order.
After that, you will see the portals and turrets arranged as shown in the image. That’s the setup you’re going for here.
Now shoot the left turret and it will light up the right turret through the portals.

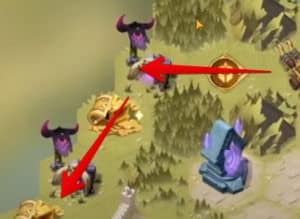
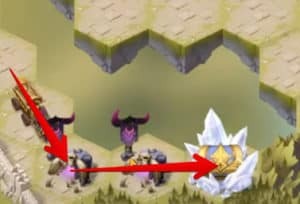
Step 4 – Now it’s time to open up the next section of the Hazy Timberland map and you do that by using the lower left switch and then shooting the right turret as shown in the image.
This will destroy the barrel on the left side and open some camps and chests.
Step 5 – now do fight the two camps in the middle, they are quite easy and the Golden Chest has 100 Diamonds and you can make good use of the relics.
Then go to the left side of the map where you just destroyed the barrel and fight through all the enemies there and use the blue lever at the end of that section!
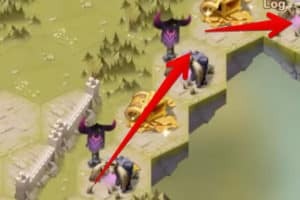
Step 6 – now the next enemies are the ones on top and with the blue stone down (because you just used the blue lever), you can now also open that section.
You do that by using the lower right switch and then the right turret, as shown in the image.
This will destroy the barrel on top and you can go there and clean that section now.

Step 7 – in this upper section is nothing relevant for the puzzle but chests and you can really use the relics you get there because those are the weakest opponents on the map now.
Clean the section and proceed.
Step 8 – to open up the next section you need to use the upper left switch first and the the lower right switch to get the portal out of your way.
Once done, you need to activate the left turret and it will destroy the barrel on the right side of the map where the next enemy camps are that should be quite easy by now as you picked up some nice relics in the last section.

Step 9 – now enter that section and also here you will find only Golden Chests and camps that will give you relics that you need to collect.
The next sections get harder so you need to pick some good relics and normally there’s no problem with these camps that reward mainly epic relics.
Step 10 – next you need to open up the lower right part of the Hazy Timberland to get to the red lever.
You do that by now using the upper right switch first, then the upper left switch and then fire the left turret. The setup needs to be exactly like shown in the image to go through the portal and get that barrel on the bottom side.
Step 11 – here you have again a couple of camps that will give you relics as well as some chests for some rewards.
It’s important that you pull the red lever once you reached the end of that section to be able to open up the next section of the Hazy Timberland map.

Step 12 – now with the red stone out of the way we can open up the next section on the left side of the map by using the lower right switch first and then activating the right turret as shown in the image.
This will destroy the barrel on the left side.

Step 13 – in this section now you will get to the first main Crystal Chest that will give you the 10x Summon Scrolls.
Enemies are okay to beat actually and with all the relics you should now have a solid setup and no problems by now.
Now it’s time to open the last section of the Hazy Timbeland.
Step 14 – the last puzzle now requires you to lower the blue lever first and then arrange the switches in the order – blue lever → upper right switch → lower right switch →lower left switch → lower right switch → left turret.
No worries, I have this here with images as well for you:
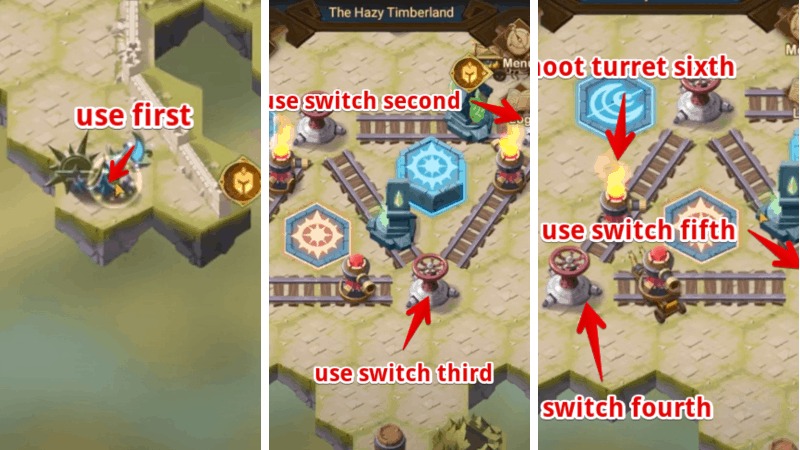
After you’ve done that, you can now use the lower left switch to get the bottom turret in position to destroy the last barrel as you can see in the image on the left side.
Now the path to the bottom is clear but still the red stone blocks the path halfway there, so go to the red lever first and use it.

Step 15 – so, last step before the boss figth.
Go to the end of the path and kill off the enemies there, you will also get some sweet legendary relics.
At the end of the path you will find a railroad switch that you need to use and the path to the final boss is open.

The final boss has plenty of Lightbearer enemies as well as Mezoth (will consume one of your tanks) and Athalia who will crush the upper backline. If you use Shemira as your carry here you will get some nice damage boost and with Lucius and his shield up you will not have a problem with additional Rowan, Belinda and Rosaline.
Don’t stop here… the next Wandering Balloon is already waiting with more rewards! See here the full walkthrough for The Depths of Time II.