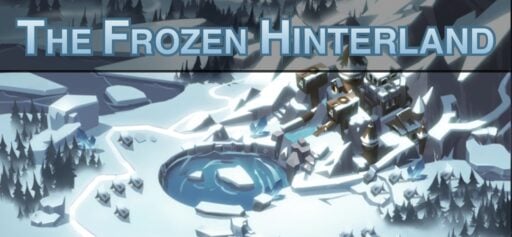
The Wandering Balloon let us re-play past Voyage of Wonders realms and the realm that just got added is The Howling Wastes, a really nice Voyage of Wonders we had back in April 2020 and it will be available in the Wandering Balloon starting August 1st, 2020.
As always, I have a step-by-step guide below that you can use to solve the realm below.
The Howling Wastes General & Rewards
The main objective in The Howling Wastes is to actually solve the puzzles to reach the final boss fight. Fights themselves aren’t that hard and if you know how to solve the puzzles you won’t have a hard time.
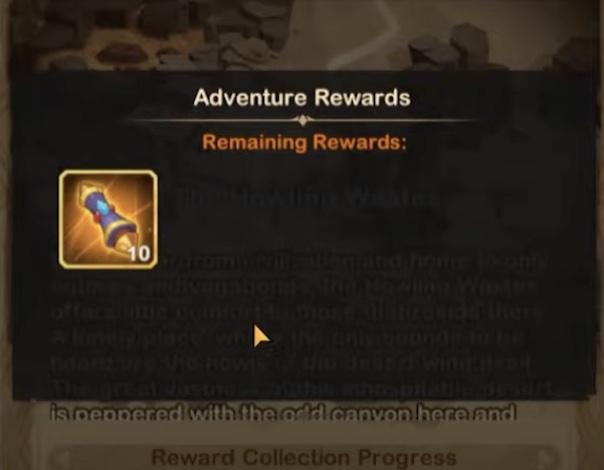
What’s The Reward In The Howling Wastes?
The main reward of the Crystal Chest will be 10x Faction Summon Scrolls and the Golden Chests will reward 90x Summon Stones and 60x Epic Summon Stones with some boosters and 100x Diamonds.
But before losing it into the rewards you need to solve The Frozen Ground first, right? If you have troubles with your team, please refer to my frequently updated guide on the best teams in AFK Arena here or the tier list of the best heroes (including their best build). Also, don’t miss out on the recently new gift codes that I posted here.
The Howling Wastes Walkthrough
Without further ado, let’s jump right into the walkthrough where I show you step-by-step how to solve The Howling Wasted and reach the final boss.
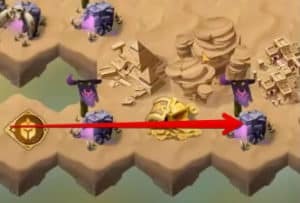
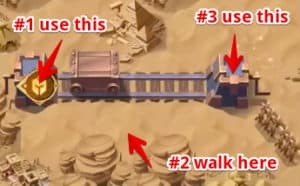
Step 1 – you don’t have many options right after the start 😉
Simply walk straight and you will find two camps there that you need to clear out and claim your first chests to enter the first main area of the map.
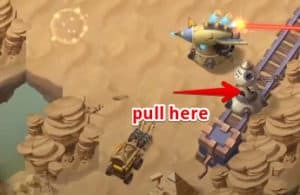
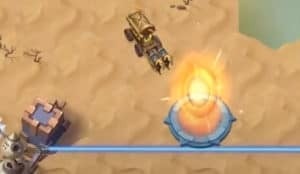
Step 2 – you need to retrace the lasers of different colors to stop a laser from shooting and this is how you open the next parts of the map in The Howling Wastes.
Right at the start, move the retractor on the rails to the upper position and it will open up the right side section where you find some camps and chests to clear out directly.
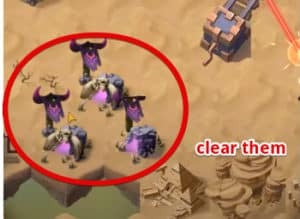
Step 3 – now that you have collected some relics and got stronger, it’s time to clear out some more enemies for more relics before entering the next section of The Howling Wastes.
Clear this section here with the 3 camps and collect the relics.
Also, there’s one camp on top that you also need to clear out now.
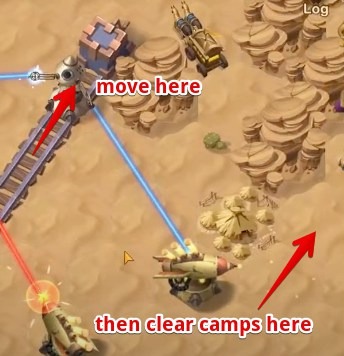
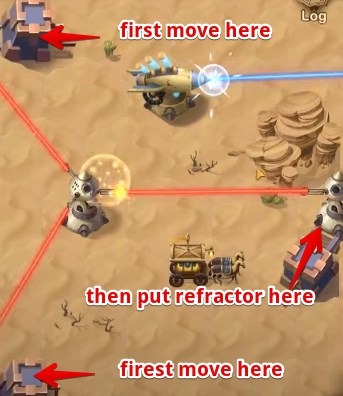
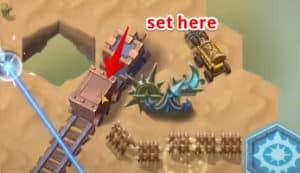
Step 4 – now it’s time to open up the next section of the map and to do that, you have to move the lasers on the left side.
First, move both the crossing blue lasers to the right position on the rails and then use the right refractor to deactivate them.
To do that, use the refractor AFTER you set the blue lasers to the right position (or it will block your horizontal path) and then move the refractor to the bottom position and you will be able to access the next section on the left side.
Step 5 – here you will find a tunnel with more camps and Golden Chests that you need to clear.
At the end, there’s only one thing you can do and that’s moving the refractor to the bottom position so the red laser will deactivate the blue laser that blocks your path. Not that hard 🙂
After that, go to the left and you will find 2 camps and 2 Golden Chests there. Clear them out now because we will block them with the next steps.
Step 6 – after you cleared the left side here you go back and the only option you have is to move that cart to the bottom position to stop that blue laser.
Do that and then you can clear out all the camps you see there for additional relics.
These enemies here are not hard but they are a little bit stronger than the ones you had before so be aware of that.

Step 7 – now it’s puzzle time in the Howling Wastes 🙂
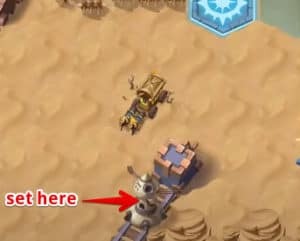
There are several things we need to set up before proceeding and the first thing is to get to the right from the section you’re in and you will see a triangle of railways and you need to set it up that the left cart is in the bottom position and the top cart is in the left position, just as you can see in the image.

Now you go back to the previous section and set the retractor to the middle position again (the position you had when you entered it in Step 5). This will stop the upper blue laser.
Do that now.
Next you set the cart here to the left position (click it directly and you will move there automatically, you will need to walk around it).
After that, walk inside this small section below the railway before you set it to the left position. Now your path is free to the upper section here.
When walking upwards now you will find 3 camps and 2 Golden Chests that you do collect and clear.
At the end of that section, you will see a blue lever that you need to pull and you can leave this area through the blue stone there.

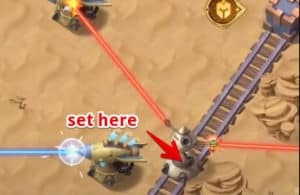
Step 8 – now you need to use the retracer here and set it to the top position.
This is the one that will help you unlock the last section with the triangle from the previous step.
So, set it to the top position like shown in the image.
Now walk back up to the top and move the cart there to the top position. This will release the blue laser and the retracted in the center will unlock you the next section.
The unfortunate thing now is that it also blocks your path now to get there so you need to use the portal. Make sure that you did clear up all the camps in this section before you enter that portal, you need the power from the relics!
Final Step – well, you now only have some camps between you and the final Crystal Chest, including the boss fight. The fights are fine and if you pick up some solid legendary relics here it will help you make the final boss fight no big deal.
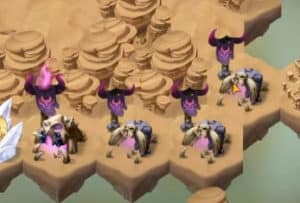
The boss fight can be nasty with Lucius and Mezoth in the frontline but with the right relics you shouldn’t have big trouble. If you got really bad relics so far you might need to re-start the Howling Wastes but I did not have any problems with some good relics (nothing really strong but also no useless ones either)
Don’t stop here… the next Wandering Balloon is already waiting with more rewards! See here the full walkthrough for Fallen Souls.